Installing PhishNotify for Outlook
Deploying PhishNotify add-in with Exchange online or Office 365 admin console uses is an XML manifest file that will make PhishNotify available in any of the following Outlook versions:
- Outlook desktop (Windows or Mac)
- Outlook web
- Outlook Mobile (iOS or Android)
The XML PhishNotify add-in will allow emails to be submitted from a user’s personal inbox or from a shared mailbox the user has access to. Note that emails cannot be submitted from a user’s junk email folder or deleted items folder.
Note: Outlook Mobile support is currently limited to Microsoft/Office 365 accounts and is not compatible with on-premises Exchange Server environments.
Installation
Office 365 Installation instructions
To install PhishNotify for Office 365 follow the steps below:
- Download the XML version of the PhishNotify add-on. This is found under PhishNotify & PhishHunter > PhishNotify Setup.
- Log into your Office 365 Online account and click on Admin.

- Expand the menu on the left by clicking Show All, then Settings > Integrated Apps or Add-ins (depends Microsoft Plan Level)

- Select Add-ins on the Integrated Apps page
- This will open up the Add-ins page in a new window. Click the Deploy Add-In button.

- In the Deploy Add-In window click Next.
- Select Upload Custom Apps.
- Click Choose File, select the XML from step 1, and click Upload.
- Select which users to deploy the add-in to and the deployment method. If you would like to deploy to your whole organization, select Everyone.
Note: It may take up to 12 hours for the add-in to be displayed for all users.
Exchange Administration Center Instructions (Exchange 2013 and 2016)
To install the PhishNotify button on your Exchange 2013 or 2016 server using the Exchange Administration Center, follow the steps below:
-
Download the XML version of the PhishNotify plugin file and place it in the directory of your choice. If you are unsure where to find the XML file, expand the PhishSim dropdown menu and select PhishNotify.
-
Login to the Exchange Admin Center
-
Exchange 2016: On the Exchange Admin Center dashboard, select add-ins under the organization heading to access the add-in management screen.
Exchange 2013: Select Organizations and click Apps
-
Click the “+” icon and select Add from file

-
In the Add From File pop-up window, select Choose File, and browse to the folder where you saved the XML manifest file that you downloaded in step 1. Once you have selected the file, click Next to install.
-
Once you’ve installed the plugin, you can select the installed add-in and select Edit (or double-click on it) in order to set the options for how it gets deployed. Make sure to click save when you are finished.
Individual Install
A user can install PhishNotify on their individual Outlook desktop client, or via the Outlook web app. Before following the below steps, they must download the XML file from Infosec IQ:Note: The below steps are for customers who currently have Microsoft/Office 365 email accounts.
Desktop Application:
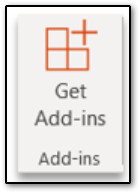
- Locate the Add-ins section on your Outlook Desktop ribbon and click Get Add-ins

- Select My add-ins from the menu on the left-hand side
- Click Add a custom add-in and click add from file
- Select the XML file that you downloaded from the Infosec IQ platform and click open
- In the pop-up window, select Install
- Close out of outlook and restart
- After restarting, the add-in will appear on the Outlook Ribbon
Outlook Web App:
- Login to your Outlook Web app
- Click into any email and select more actions

- Select Get add-ins from the drop-down menu

- Select My add-ins from the menu on the left-hand side
- Click Add a custom add-in and click add from file
- Select the XML file that you downloaded from the Infosec IQ platform and click open
- In the pop-up window, select Install
- You may be required to sign-out and log back in to view the add-in
- The add-in will appear in the ribbon of each email

Note: PhishNotify will only show up on the ribbon if it was deployed individually or manually pinned. If deployed through Centralized Deployment, PhishNotify will show up in the More actions menu.


